
Get an Insight on Previous Experince
Take a look at my resume and read about the Stop-Motion Animation Course I curated for grades 6-12.

Teaching Animation
A new prospect took place during the school year, I was teaching animation for the first time to students who were learning how to tell stories through a new perspective. They probably had experience drawing comics or writing booklets of their own, but creating their own animation is a new front they didn't know was possible. I broke down the similarities between comics and animated cartoons; first and foremost, they are different forms of visual storytelling. Visual Storytelling is a core foundation of animation and of many other art mediums. The students were thrilled by the new course material, yet anxious when anticipating the intensive art form. To ease their worries, I shared that this class will take it step by step.
Zines and Comics
With visual storytelling in mind, the class started with Four Panel Comics, then worked their way to zines. Although zines are not animations, they are an easy form of involving their visual skills to tell a narrative. Students were shown a PowerPoint on the elements of art and principles of design. It included the components that need to be taken into account in developing a visual story. Students were asked to think of examples where visual storytelling played an important role in our history. Starting with cave art, newspaper comics, and paintings. Another was "What are the benefits of visual storytelling in helping cultures grow?” After students had a moment to reflect, they shared visual art that can be used to record information. At that moment, I realized they were on the right track. They were given instructions to make a comic or story of their own, but each zine page needed a drawn image ( Minimum 8 images on a piece of paper). The students practiced their visual storytelling, visual language, and how to get an idea out quickly with just a piece of paper and a pencil. Students were in an environment to embrace a unique way of expressing themselves while appealing to the viewer. This also gave me an idea of what the class understanding was on narrative, visual structure, and their overall appeal in interest.


Phenakistoscopes
Afterwards, we moved on to phenakistoscopes. The phenakistoscope is actually the earliest animation device to demonstrate continuous movement. It uses the principle of persistence of vision to give the illusion of motion and is used to create film. Phenakistoscopes are an example of early video techniques; they were called movie wheels. In both instances, they use minimal differences between images to create the illusion of movement. This was an introductory assignment so the students could grasp the understanding of Animation frames and how objects change to reinforce the theme of movement. Firstly, students were handed individual sheets of paper to practice the idea of phenakistoscopes, afterwards students were put in groups, handed posters, and assigned to create a larger phenakistoscope to be hung in the classroom.
Flip Books
After students developed an experience with visual storytelling, they were now put to the test to practice animation by creating flipbooks. This is an assignment that requires minimal equipment. You can use packs of index cards (held together with large binder clips), scratch pads (reinforce the top with tape), or even sticky notes. I displayed a PowerPoint about straight-ahead animation and the 12 principles of animation so students were able to embrace the stream-of-consciousness nature of visualizing their stories. After the PowerPoint, a printout of a walk cycle, a flipbook worksheet, and other art class materials were handed out for practice. Students drew on ten separate sections on the flip-book worksheet to complete the practice classwork. Students traced their images, cut the sections, put them in order, and started flipping away.
For their official classwork of the week, they were given instructions to create a flip book of their own to work on for the next few class periods. The flipbook should consist of 60 pages spread out between 6 class periods.


StoryBoarding
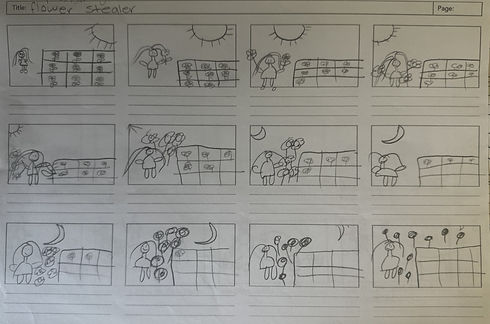
For the storyboard, students were told it's vital to involve the entire team during this portion of the project. It's to map out their full short film and which characters and scenes they should focus on. They were given time to research ideas, film scenes, and stop-motion films to find inspiration. Then they were given the task to complete their storyboard.

Background and Character Design
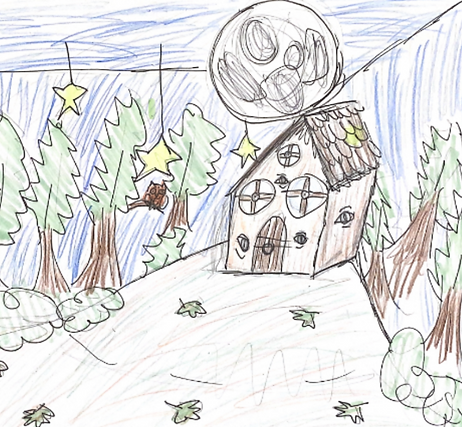
Once students had an idea of what story they wanted to tell and where their story was heading, the next thing in the packet was to sketch out designs for their backgrounds and characters. They were presented with a PowerPoint on background design and character design to learn shape value and color themes to help their understanding of where to start. It provided an understanding of how each location needed to be visually distinct and relevant to its story. In the character design PowerPoint, students were taught how character design is super important in animation because it's how we connect with the story, and it's through the characters. They grasped an understanding of how well-designed characters help viewers understand who they are and what they're feeling, which makes the story more engaging. They were asked to create initial sketches of the main character of their film, considering the personality, role in the story, and visual appearance.


Background Building
After designing and getting an idea of the background and character, the students were introduced to their next assignment. Building the set and characters for their film. The students had the flexibility to choose any material they decided would be the best fit, which also allowed them to explore different materials and techniques for construction. They were guided on how to build 3d shapes out of paper and sculpt out of clay, and a few groups were asked to learn how to sew fabric. Materials like construction paper, paint, scissors, etc., were provided in class, and students brought additional materials from home, like a shoe box and clay. This was a challenging portion of the project because students had to figure out problems in building their set with their team. There would be moments where classes would get sidetracked and needed to be calmed down, but they are children, and they were simply enjoying their time in the class. After settling them down, they would get their work done.


